
Meet Us at 140th Canton Fair! Phase 1 Booth:3.1M31 I Phase 2 Booth:10.1 I33-34

×

Why Does a Sensor Faucet Keep Running? Solenoid Valve Troubleshooting

novembre 17, 2026

Quick Answer:

A sensor faucet that keeps running usually has either a false activation signal or a solenoid valve that cannot close fully. Check power, the sensor window and nearby reflective surfaces first, then isolate the water and power and inspect the valve for debris, scale or a damaged diaphragm. Clean only the parts the manufacturer lists as serviceable; otherwise fit the specified replacement. Interhasa self-produces faucets, and buyers of the Model 202 or C211 can request the matching valve and parts information for the exact model.

A faucet that runs after the hands leave wastes water and frustrates users. A dirty sensor window and a valve held open by grit need different fixes: cleaning the sensor will not repair a worn valve, and a new valve will not cure a permanent reflection.

Why Does a Sensor Faucet Keep Running?

A short run-on of a few seconds after the hands leave may be the model’s intended shutoff delay. Continuous flow, a steady trickle that never stops, or repeated activation with nobody near the faucet are different faults and point to different checks.

The faucet is a control chain: power, sensor, control box and solenoid valve. The sensor triggers flow, the control box interprets the signal, and the valve opens the water path. A fault anywhere can look like a valve problem.

Le sensor faucet range includes several body styles; use the manual for your exact model, not a sequence from another faucet.

Technician in blue gloves wipes the sensor window of a chrome faucet in a bright bathroom, with callouts reading Check the sensor first, Check reflections, and Clean the window.

Is the Problem Power or the Sensor Signal?

Check power first. For a battery model, confirm the battery type, age and low-battery indication. For a mains-powered model, check the adapter, connection and circuit protection without opening sealed parts. A loose connector or failed adapter can mimic a sensor fault. Isolate power before inspecting connections, and leave mains wiring to a qualified person.

Clean the sensor window with a soft damp cloth and mild detergent, then dry it. Soap film, hard-water spots and cleaning residue can scatter the infrared beam. Avoid abrasive pads and aggressive chemicals. The infrared faucet guide explains how the sensor emits and receives reflected light.

Look for mirrors, polished partitions, metal dispensers or shiny taps inside the detection zone. A permanent reflection can hold the valve open, and direct sunlight can also interfere. Adjust the object or sensor only within manufacturer limits.

Le AC vs DC power guide explains the maintenance differences. The Model 202 page lists AC 110–220 V and DC 6 V options, a 30 cm induction range and a 0.05–0.6 MPa water pressure range. Those figures are model-specific; confirm them against the current drawing.

A Solenoid Valve Is a Controlled Tap

A solenoid valve is an electrically controlled tap inside the faucet. It has a coil, a movable plunger or pilot, a diaphragm and a spring. In many commercial faucets it is normally closed: with no current, the spring and water pressure hold the diaphragm against the seat. When the sensor signals, the control box energizes the coil, the magnet pulls the pilot open, and pressure changes across the diaphragm so water flows.

When the signal stops, the spring returns the pilot and the diaphragm reseats. Debris on the pilot or seat, or a torn diaphragm, can prevent sealing even when the coil works.

The valve is not the sensor: no signal means no opening, while a worn seat can fail to close even with a correct signal. Diagnose both.

Match the Symptom to Debris, Diaphragm or Coil

Debris interferes with the small sealing surfaces. Sand, rust, solder residue or scale can hold the pilot open, stop the diaphragm seating or score the rubber. The result is often a trickle or continuous stream, sometimes intermittent.

Run-on often begins after plumbing work. Restoring the main stirs sediment, and new pipework leaves cutting debris, flux or sealant. A missing inlet filter gives that material a path to the valve. Hard water and ageing supply lines raise the risk.

Infographic in a bathroom showing four faucet symptoms matched to checks: continuous flow to signal or valve, steady trickle to sealing surfaces, no flow to power or inlet, and weak flow to supply restriction.

Use the symptom to narrow the cause, then inspect:

  • Continuous full flow, even with the sensor disconnected by an authorized technician: valve held open, manual override open or control output stuck.
  • Steady trickle after shutoff: debris on the seat, damaged diaphragm, worn O-ring or scored seat.
  • No flow at all: power, sensor, coil or blocked inlet.
  • Weak flow but normal shutoff: inlet filter, aerator or supply restriction.

A failed coil usually prevents opening, not closing. A torn diaphragm or seat debris is more likely to cause run-on. Record the symptom before dismantling; the evidence disappears once the valve is disturbed.

Isolate, Inspect and Service the Valve Safely

Water and electricity share the equipment, so isolate both. Close the stop valve, open the faucet to release pressure, isolate power at the breaker or disconnect the battery per the manual, and use lockout or tagout if required. Verify the circuit is de-energized before touching wiring. Wear eye protection and gloves, and place a bucket below the work area.

Do not open sealed electrical parts, cut connectors or bypass the sensor to test the valve. If the job involves mains wiring, a fixed connection or a control box the manual does not let you open, stop and call a qualified technician. Follow the manual for torque, sequence and approved parts; a cross-threaded valve or an upside-down diaphragm may leak immediately.

Record the model, serial number and fault, then obtain the parts diagram and confirm which parts are serviceable. Disconnect the coil only after power is confirmed off. Remove the coil and cap in the manual’s order and keep the spring, plunger, diaphragm and seals in a tray. Inspect the inlet screen for grit, rust and scale; the diaphragm for tears, swelling, hardening or a distorted edge; the seat for scoring, mineral buildup and embedded particles; and the O-rings for cuts and flattening.

Clean only permitted parts. Rinse a serviceable screen or diaphragm with clean water and use a soft brush where allowed. Do not scrape the seat, poke the pilot with wire or soak parts in an unapproved solvent. If the valve is sealed, replace it. Reassemble in order, seat the diaphragm correctly and tighten to the manual. Restore water slowly, check for leaks, then restore power. Test activation, shutoff and leakage through several cycles; if it still runs on, stop and reassess.

When Should You Clean, Replace the Valve or Replace the Faucet?

Clean when the valve is serviceable, loose debris is the only finding, the diaphragm, seat and seals are intact, and the source is corrected. If it clogs again after a proper flush, replace the valve.

Replace the solenoid when the coil fails, the diaphragm is torn or deformed, the seat is scored or cracked, the housing is damaged, or correct parts are unavailable. Replace the faucet when the model is obsolete, the control box is sealed and unavailable, the body is damaged, or repeated repairs cost more than planned replacement.

Identify the Right Replacement Valve

Start with the exact model and serial number, not the valve’s appearance. Record the supply voltage and whether the faucet is AC, DC or dual-supply. Note the connector type, wire count, body style and port or tubing connection. Ask for the manufacturer’s part number for the complete valve assembly, not a generic “6 V solenoid.”

Voltage alone does not make a valve interchangeable. Coil construction, orifice size, pressure rating, flow direction, connector keying and diaphragm material must also match. Threads alone do not prove a match. Request a dimensioned drawing and confirm the pressure range.

Le Model 202 page lists voltage, range, pressure and control-box arrangement, but request the current parts list for the production version. The C211 page describes its ABS and zinc-alloy body and curved sensor but does not publish a replacement valve part number.

Robinet automatique de salle de bain commercial Interhasa modèle 202

Interhasa sensor faucet model 202, for commercial bathroom usage, pure copper material,durable chrome surface. DC or AC power dual supply,with control box and 1-3 pipe accessary , a 3 connector hot/cold adjustor. Welcome to contact us for more model.

Explorer le produit
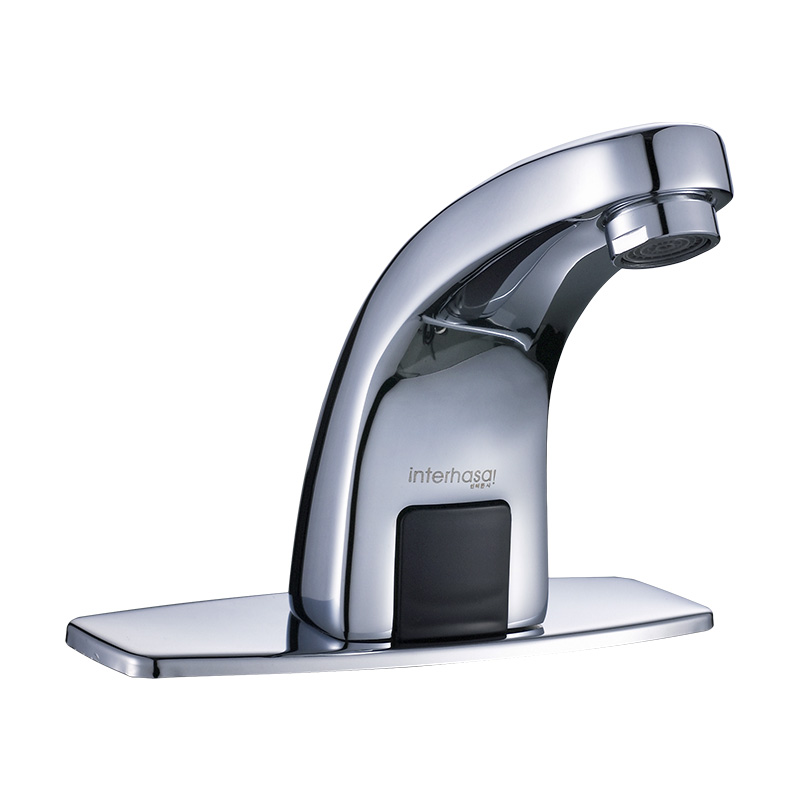
Robinet automatique de salle de bain commercial Interhasa modèle 202

Prevent Repeat Sticking With Routine Checks

Flush supply lines after mains work, repairs or new pipework, and fit or restore the inlet filter where provided. Check pressure against the model’s range; excessive or unstable pressure stresses the valve. For hard water or known sediment, include the inlet screen in routine cleaning.

Clean the sensor window on a set schedule, log battery replacements and inspect connectors during the same visit. Train staff to report a running faucet rather than covering the spout. Keep approved spares for critical basins, but confirm the part number against the installed version.

At commissioning, record activation distance, shutoff and leaks over several cycles. Review repeat failures by model and location. The sensor faucet blog section has more guidance.

Questions fréquemment posées

Can I clean a stuck solenoid valve instead of replacing it?

Only if the manufacturer lists it as serviceable and the internal parts are intact. Some can be rinsed and reassembled; others are sealed and must be replaced. Do not open a sealed valve or use sharp tools on the seat.

Why does the faucet run only after the water is shut off and restored?

Restoring the supply stirs sediment that can lodge in the pilot or seat. Flush the line, check the inlet screen and inspect for debris. If it repeats, find the sediment source.

Can I use any 6 V solenoid as a replacement?

No. Voltage is one characteristic. Coil, orifice, pressure rating, flow direction, connector and diaphragm material must match. Use the manufacturer’s part number for the exact model.

Is it safe to replace the solenoid myself?

Competent maintenance staff can follow the manual after isolating water and power. Mains work, sealed control boxes and tasks outside the manual need a qualified technician. Never work live or bypass the sensor.

Will a new solenoid fix a sensor that keeps activating?

No. A new valve cannot correct a false signal, reflection or faulty control box. Diagnose the signal first, then repair the valve only if it also fails to close.

L'essentiel

A sensor faucet that keeps running is a diagnosis problem before it is a parts problem. Confirm what “running” means, check power and signal, then isolate water and electricity and inspect the valve for debris, diaphragm damage or a worn seat. Clean only what the manual permits, replace the valve when the evidence supports it, and replace the faucet when repairs no longer make economic sense.

Interhasa self-produces faucets, so you can send the model, serial number, photos, voltage and fault description for a parts review. Standard orders have no general MOQ; custom packaging has its own MOQ. Orders above USD 8,000 qualify for free FOB Ningbo, and lead time is set by the confirmed order. Use the page de contact to request the manual, parts list and replacement valve details, or the FAQ page for general company information.

Obtenir un devis
Recherche
COLLABOREZ AVEC LES EXPERTS EN SÈCHE-MAINS.

En tant que fabricant certifié, nous proposons des prix de gros compétitifs et des solutions personnalisées pour votre marque.