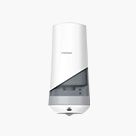



Interhasa Manual Soap Dispenser Model F7020
Capacity: 350ml * 1 / * 2 / * 3
Material: ABS
Meet Us at 140th Canton Fair! Phase 1 Booth:3.1M31 I Phase 2 Booth:10.1 I33-34

A manual soap dispenser may leak because it is overfilled, the soap is too thick or thin for the pump, a gasket is worn, the bottle is cracked, dried soap is blocking the valve, or the pump was reinstalled incorrectly. Stop refilling and locate the leak before replacing parts. Interhasa manufactures manual dispensers, including the F7020 and F7016 liquid models; check the model manual or ask the supplier to confirm compatible soap and parts.
Leaks often have a simple cause. Check where the soap is escaping, then inspect the bottle, pump, seals, soap and installation. This guide covers seven checks to help distributors, facilities teams and procurement managers identify the likely cause before deciding whether to repair or replace the dispenser.
Find the leak point first. A drip at the spout, a film under the pump head and a puddle under the bottle point to different causes.
Dry the dispenser and place paper under it. If the leak reappears at the collar, the fault is at the joint; if it appears at the base, suspect the bottle. The manual soap dispenser range shows different body styles, so use the matching model manual for the exact unit.

Overfilling is a common and inexpensive cause. A manual dispenser needs headspace above the soap. When the pump is pushed down, it displaces volume; if the bottle is full to the neck, that displacement pushes liquid out through the collar or vent. Warm conditions and foaming soaps make the effect worse.
Find the fill line on the bottle or in the manual. If there is none, fill only to the level the manual specifies. Remove the pump, fill slowly, refit it and prime over a basin or cloth. Wipe the collar before replacing the head so residual soap does not attract dirt or hide a new leak.
Do not top up “just in case” between services. A fixed fill quantity per refill is easier to audit and reduces spills. If cleaners carry bulk soap, give them a marked measure rather than letting them judge by eye.
The bulk-fill versus cartridge comparison explains the refill-format trade-offs; whichever format you use, the fill line and procedure apply.
Manual pumps are designed around a range of soap thickness. Soap that is too thick may not flow into the pump chamber, so the unit dispenses weakly and can seem to leak when users pump repeatedly. Soap that is too thin can slip past the valve or seals and drip from the spout. Diluting a concentrate incorrectly, mixing brands or adding water can move the soap outside the intended range.
Follow the label and the dispenser manual. Do not assume a soap that works in one dispenser will work in another, and do not mix incompatible chemicals. Some concentrates must be diluted; others are ready to use. If the manual does not name an approved soap, ask the supplier to confirm suitability for the model and use.
Test a small quantity before changing the whole site. Fill one dispenser to the correct level, prime it and observe a full day of use. Check for dripping, hard pumping and residue at the spout. The F7016 manual dispenser is a liquid-soap model with 350 ml per head, but its page does not declare universal soap approval. Confirm the soap and any dilution with the supplier.
Inspect the pump head, gasket, seal and bottle thread as a set. Look for hardened or flattened rubber, cuts, missing pieces, soap packed behind the seal, a cracked pump body and damaged threads. An over-tightened gasket can deform and fail to seal; a cross-threaded collar can feel tight while still letting liquid past.
Clean the parts before judging them, because dried soap can look like a damaged seal. Do not stretch a gasket, cut a new one from sheet material or lubricate it with a product the manual does not approve. Those shortcuts can change pump behaviour and damage the plastic.
Reassemble by hand unless the manual specifies a tool. Hand-tighten the collar, check that the gasket sits flat and the pump is square. If the leak continues after correct assembly, the gasket or pump may need replacement. Use only parts listed for the model. The F7020 manual dispenser lists one-, two- and three-head versions with 350 ml per head, but not gasket dimensions, a spare-parts list or a service life. Ask for those details before ordering.
Dried soap around the spout or in the valve can hold it partly open, so the dispenser drips between uses. Residue can also block the air path, making the pump feel stiff or draw air instead of soap. The result can look like a leak when flow is simply restricted.
Clean according to the manual. Warm water and a soft brush are safer than abrasives, solvents or sharp tools. Soak only the parts the manual says can be soaked, and let everything dry before reassembly. Do not poke a wire into the valve or enlarge an air hole; that can damage the sealing surface.
After cleaning, prime the pump as described in the manual and test it over a basin. If it dispenses evenly and stops cleanly, residue was the likely cause. If it still drips, inspect the seal and valve again. Repeat leaks after cleaning suggest a worn part or unsuitable soap, not a cleaning failure.
A dispenser that is not level can hold soap against the wrong side of the seal. A loose or distorted bracket can tilt the bottle, and a pump fitted at an angle may not seat flat on the gasket. Check the mounting with a spirit level, confirm the bracket fixings are secure and make sure the bottle hangs straight.
Refit the pump squarely. Start the thread by hand, turn it until it seats, then tighten firmly without forcing it. Do not use the pump head to lever the bottle into position. If the collar binds, check the thread for damage or debris rather than tightening harder.
Some leaks at the wall fixing are caused by the building, not the dispenser. Water may track down a pipe or through a wall, or a fixing may pull out of soft substrate. Repair the fixing and investigate the source before blaming the unit. If the model needs a specific mounting height or clearance, follow the manual. The Interhasa FAQ page covers general company questions, but installation details should come from the model documentation.
Repair is reasonable when the fault is accessible and supported: a loose collar, a cleaning issue, a replaceable gasket, a listed pump or a mounting problem. Repair is also better when the dispenser is part of a matched washroom set and replacing one unit would create an inconsistent look or spares problem.
Replacement is more sensible when the bottle or body is cracked, the pump is sealed and not serviceable, the model is obsolete, spare parts are unavailable, or the unit has leaked repeatedly after correct cleaning and reassembly. Consider downtime and labour as well as part cost. A cheap repair that fails again in a busy washroom can cost more than a new unit.
Do not replace a dispenser merely because it dripped once. Confirm the leak point, correct the fill and soap, clean the valve and check the mounting first. If the unit is automatic and the site needs touchless operation, compare the options before buying another manual model; the automatic versus manual comparison sets out the operational differences.

Capacity: 350ml * 1 / * 2 / * 3
Material: ABS

No. The pump is matched to a viscosity range and a compatible chemistry. Soap that is too thick, too thin or chemically unsuitable can clog the valve, drip or damage seals. Follow the model manual and the soap supplier’s dilution instructions, and confirm any substitution with the dispenser supplier. Do not mix incompatible chemicals to use up old stock.
Fill only to the marked level, wipe the collar, refit the pump squarely and hand-tighten it. Prime over a basin and check it after the first few uses. If it still leaks, identify whether the liquid comes from the spout, the collar or the bottle base; each points to a different fix. A leak that starts only after refilling usually indicates overfilling or a disturbed gasket.
Not necessarily. Liquid at the bracket may come from a loose fixing, a distorted bracket, a tilted bottle or water tracking from the building. Tighten or repair the mounting and check the wall substrate. If the bracket is secure and the leak continues, inspect the bottle and pump joint before replacing the dispenser.
A leaking manual soap dispenser is usually a diagnosis problem, not a disposal problem. Locate the leak, check the fill level, match the soap to the pump, inspect the gasket and bottle, clear dried residue, reassemble squarely and mount the unit level. Only then decide whether a supported repair or a replacement is the better commercial choice.
If you need a model for a new or replacement installation, review the F7020 and F7016 pages and confirm the head count, capacity and soap requirements. Interhasa self-produces soap dispensers, so you can send the leak point, soap type and required configuration for a model review. Standard orders have no general MOQ; custom packaging has its own MOQ. Orders above USD 8,000 qualify for free FOB Ningbo, and lead time is set against the confirmed order. Use the contact page to ask for the manual and spare-parts details.