Meet Us at 139th Canton Fair! Phase 1 Booth: 3.1L38 | Phase 2 Booth: 10.1i33-34





Automatic Soap Dispenser Not Working? 7 Commercial Fixes
Quick Answer
An automatic soap dispenser stops working due to dead batteries, a clogged pump, or a dirty sensor. Fix it by replacing batteries, cleaning the sensor with a damp cloth, and flushing the nozzle with warm water. Use liquid soap to prevent clogs. Interhasa, a self-owned factory for commercial bathroom equipment, produces durable dispensers designed for reliable, low-maintenance use.
If your automatic soap dispenser is not working, the most common causes include dead batteries, clogged soap, or a faulty sensor.
Fixing these issues usually involves cleaning the dispenser, replacing the batteries, or unclogging the pump.
This guide walks you through troubleshooting and repair steps to get your soap dispenser working again.
Common Reasons an Automatic Soap Dispenser Stops Working
An automatic soap dispenser can stop working for several reasons, but most are easy to diagnose and fix.
#1. Sensor Malfunction
If the sensor is dirty or blocked, it won’t detect motion properly. Soap residue or dust can interfere with its operation.
#2. Empty or Clogged Soap Reservoir
When the soap reservoir is empty or clogged, the dispenser won’t release any soap. Thick or expired soap can also cause blockage.
#3. Battery Issues
If the batteries are weak or dead, the dispenser won’t function. Corrosion in the battery compartment can also prevent power from reaching the device.

The Right Choice for Your Business – Check It Out!
#4. Faulty Pump Mechanism
The pump is responsible for drawing soap from the reservoir and pushing it out. If it’s clogged, broken, or worn out, the dispenser won’t work.
Understanding these issues helps determine the best troubleshooting steps.
How to Troubleshoot an Automatic Soap Dispenser
If your automatic soap dispenser isn’t dispensing properly, follow these troubleshooting steps:
Start with the symptom: no indicator usually points to power or wiring; an active sensor with no output points to an empty reservoir, air lock, incompatible viscosity, blocked tube or pump failure; continuous dispensing points to sensor obstruction, reflective surfaces or control faults. Record the model and indicator behavior before replacing parts.
If the dispenser still fails after the approved troubleshooting steps, send the model number, indicator behavior and a short test video to our technical team.
Need a second opinion on a faulty unit?
Send the model, indicator status and a 15-second test video. Our engineers will review the symptom pattern and recommend the correct part — no unnecessary pump or sensor replacement.
View More →Commercial Automatic Soap Dispenser Troubleshooting by Symptom
For commercial washrooms, troubleshoot by symptom before removing parts. Record the dispenser model, power source, indicator-light behavior, soap type and the exact failure pattern. This prevents unnecessary pump or sensor replacement and gives the supplier enough evidence to recommend the correct part.
| Symptom | Likely Causes | First Check | Corrective Action | Escalate When |
|---|---|---|---|---|
| No indicator or response | Depleted or reversed batteries; corroded contacts; disconnected or incorrect power supply | Check polarity, battery condition, dry contacts, adapter and outlet against the model instructions | Install the approved power source and clean only accessible contacts after isolating power | There is heat, a burnt smell, liquid inside the electronics or repeated power failure |
| Sensor responds but no soap is dispensed | Empty reservoir; air lock; blocked nozzle or tube; incompatible liquid viscosity; pump fault | Check liquid level and type, indicator behavior, tube seating, nozzle and the approved priming sequence | Refill with an approved liquid, prime as instructed and clean removable wetted parts using the model procedure | The pump remains silent or cannot prime after the approved checks |
| Intermittent or low output | Low battery; partial blockage; air leak; tube not fully seated; viscosity mismatch | Compare the liquid with the approved type and inspect battery condition, tube joints and nozzle | Replace batteries, reseat the tube and retest with an approved liquid | The fault repeats across multiple units or batches |
| Continuous or false activation | Contaminated sensor window; reflective object; unsuitable placement; sensor or control fault | Clean and dry the sensor, then remove nearby reflective objects and retest | Reposition or adjust only where the model instructions allow; otherwise reset according to the manual | The dispenser continues to trigger in a controlled test |
| Leakage | Overfilling; loose reservoir or tube; damaged seal; incompatible chemical | Inspect the fill line, cap, tube joints and accessible seals | Correct the fill level and reseat or replace approved service parts | Liquid has reached electrical parts or the enclosure is damaged |
Step 1: Check the Batteries
Replace old or weak batteries with fresh ones and ensure they are inserted correctly. If the dispenser has a power indicator light, check if it turns on.
Step 2: Clean the Sensor
Wipe the sensor with a damp cloth to remove dust, soap buildup, or water stains that may block its functionality.
Step 3: Inspect the Soap Reservoir
Open the dispenser and check if the soap is too thick or clogged. Do not dilute soap unless the dispenser manufacturer explicitly permits it. First verify the specified liquid type and viscosity range, then flush the system according to the model manual.
Check Soap Type and Viscosity Before Replacing the Pump
Liquid-soap, foam-soap and sanitizer dispensers use different pumps, air-to-liquid ratios and seal materials. Do not change liquid type or dilute a product unless the dispenser specification permits it. For a bulk program, test the locally available soap in a production sample and document the approved viscosity range before shipment.
Step 4: Test the Dispenser
Place your hand under the sensor to see if the unit responds. If it still doesn’t work, move to the next step.
Step 5: Prime the Pump
Some dispensers require priming to pull the soap through the system. If air is trapped inside, repeatedly pressing the manual override button (if available) can help.
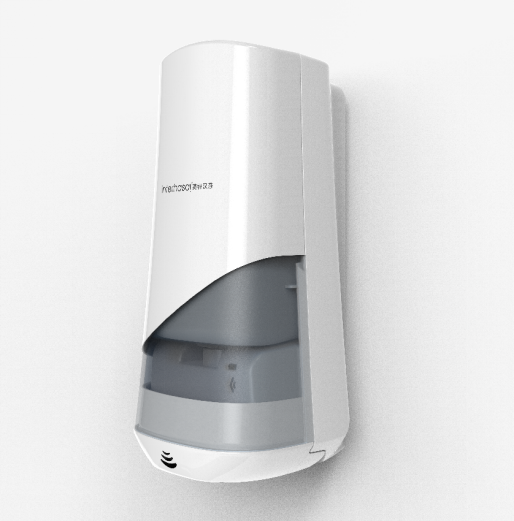
Step 6: Reset the Unit
If your dispenser has a reset button, use it to restore factory settings and clear minor technical issues.
Step 7: Check for Clogs in the Nozzle
If the soap is not coming out, soak the nozzle in warm water or clean it with a toothpick to remove hardened soap.
If none of these steps work, the issue may require a deeper fix. Seeking professional help is optimal.
How to Fix a Soap Pump
The pump is essential for dispensing soap, and when it fails, it often requires cleaning or replacement.
Step 1: Remove the Pump
Detach the pump from the soap reservoir and inspect for any visible blockages.
Step 2: Clean the Pump Mechanism
Rinse the pump under warm water and use a small brush or pin to clear out dried soap.
Step 3: Test the Pump with Water
Before reattaching it, fill it with water and pump it manually to check if it flows smoothly.
Step 4: Reinstall and Test
Place the cleaned pump back in the dispenser and test its function.
If the pump remains unresponsive, you may need replacement parts for the soap dispenser pump for a long-term fix.
When to Replace Automatic Soap Dispenser Parts
Sometimes, cleaning and troubleshooting aren’t enough, and replacement is the only solution.
- Sensor Failure: If the sensor stops working despite cleaning and battery replacement, it may be damaged and require a new unit.
- Broken Pump: If the pump doesn’t work after multiple attempts at unclogging and testing, replacing it is the best option.
- Battery Corrosion Damage: If battery leakage has caused internal damage, replacing the dispenser may be more cost-effective than repair.
When buying replacement parts, ensure they are compatible with your dispenser model to avoid further issues.
For multi-site or distributor orders, request a spare-parts list, pump and sensor replacement lead times, approved soap-viscosity range, warranty terms and batch test records. Standardized service parts reduce restroom downtime and simplify inventory across locations.
Planning your next bulk order?
Request a soap-compatibility sample test and a spare-parts plan. We’ll verify the approved viscosity range for your liquid, confirm pump and sensor lead times, and prepare batch test records for your washroom project.
View More →Check Soap Type and Viscosity Before Replacing the Pump
Liquid-soap, foam-soap and sanitizer dispensers use different pumps, air-to-liquid ratios and seal materials. Do not change liquid type or dilute a product unless the dispenser specification permits it. For a bulk program, test the locally available soap in a production sample and document the approved viscosity range before shipment.
Tips to Prevent Future Issues
Preventive maintenance can help extend the life of your automatic soap dispenser and reduce the need for repairs.
Tip #1: Clean the Sensor Regularly: Wipe down the sensor at least once a week to prevent dust and soap residue from interfering with its function.
Tip #2: Use the Right Soap: Avoid using thick or gel-based soaps that can clog the pump. Opt for liquid soaps recommended by the manufacturer.
Tip #3: Replace Batteries Promptly: When the dispenser shows signs of weak power (e.g., a blinking red light), replace the batteries before they die completely.
Tip #4: Flush the System Occasionally: If soap isn’t dispensing smoothly, flush the system with warm water to clear any buildup inside the pump and tubing.
By following these practices, you can keep your soap dispenser working efficiently for a longer period.

Find Your Perfect Fit – Explore Our Range Now!
Fixing Automatic Soap Dispensers: Conclusion
An automatic soap dispenser not working can often be fixed with simple troubleshooting steps, such as replacing batteries, cleaning the sensor, or unclogging the pump.
If the problem persists, repairing or replacing key parts like the pump may be necessary.
Regular maintenance and proper soap usage will help prevent future breakdowns, ensuring a smooth and hygienic handwashing experience.